Keeping your OnePlus One running smoothly can be taxing, especially if you spend most of your day looking for ways to tweak performance settings like me. Sometimes I get lucky and end up with a faster phone, but because I experiment so much, I often end up restoring it back to stock. This process can get old really quick, but when I started using the Bacon Root Toolkit from WugFresh, it became exponentially easier.
Usually, going from stock to rooted and then back again can take a good chunk of time and a ton of ADB and fastboot commands, but with Wug's Toolkit, each step is automated and requires just a single click. It's only for Windows, so Mac and Linux users still have to stick with fastboot commands in terminal, unless they're running a virtual box.
Step 1: Enable USB Debugging on Your OnePlus One
Before you are actually able to use any of the functions of the toolkit, you will need to enable "Developer options" on your OnePlus One, then check the box to enable "USB debugging" on your device.
Step 2: Install the Toolkit
Download your copy of Wug's toolkit below, then run it and let the files that it needs to root your One update.
Once the drivers are installed, you can plug your One in and have the toolkit "Auto Detect" which ROM your phone is currently running.
Step 3: Back Up, Unlock, Root, & More
The Bacon Root Toolkit has a ton of features, and the automated commands it issues make modding your device as easy as can be.
Toolkit Features
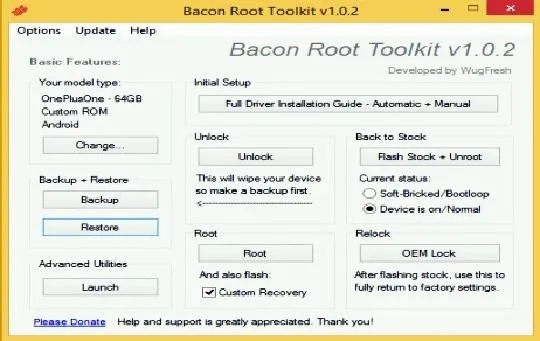
If you have a completely stock OnePlus One, the first thing you are going to want to do is to unlock the bootloader through the "Unlock" option, which will allow you to flash a custom recovery and ROMs.

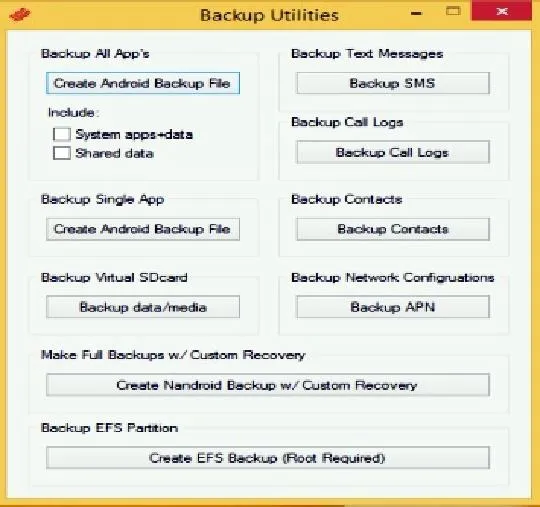
This process will completely wipe your device, so before proceeding, click "Backup." You will then have to select which data you want to back up and where it will be stored.
Remember that while signing in with your Google account will restore apps after a full wipe, data from those apps will be lost—instead, use the "Create Android Backup File" option to backup (and subsequently restore) not only apps, but the data associated with them. You can also back up single apps, call logs, contacts, and messages using this utility.

After the backup is finished, you can select "Unlock." After that, enable USB debugging once again, then you can root your device. If you plan on flashing ROMs or other mods, you should tick the option to also install a "Custom Recovery." Once you've rooted and unlocked your device, you can "Restore" the backup you made earlier.
Advanced Utilities
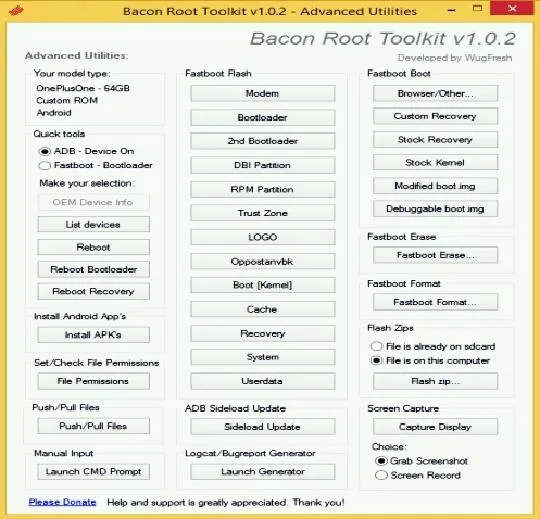
As the name implies, these options are only intended for those who know what they are doing. Unless you know exactly what each option means, you should proceed with caution.
The two features I use the most in this menu are "Install APKs" or "Screen Recording" if I need to test out an app and already have my One plugged into my PC. Be weary of the "Fastboot Flash" options, as flashing the wrong file here may be the easiest way to soft-brick your device.

Returning to Stock
This is by far my most used feature with this toolkit. Usually going back to factory settings requires a bunch of time flashing individual image files, but with Wug's toolkit, you can just click "Flash Stock + Unroot," select if your device is functioning normally or is soft-bricked, then watch as your device returns to factory settings. If your device ever needs service, use this option, then relock your bootloader using the "OEM Lock" option.
Bacon Root Toolkit makes it so that you can really try just about any mod for your OnePlus One without worrying about causing irreverible damage. So give it a shot, ask us any questions, and let us know what you think in the comments below or via our Facebook and Twitter feeds.


Comments
No Comments Exist
Be the first, drop a comment!