With the recent launch of the OnePlus 6T, the company continues to impress us with some of the best phones when it comes to the rooting and modding. OnePlus has made it easy enough to get up and running with the rooting process as fast as possible. The OnePlus devices follow the same core principles Google uses for their Pixels, which is excellent news for both the user and the development side of things.
Whether you're a pro at the rooting stuff or just getting started, the OnePlus 6T is a solid choice for diving into the modding scene. The most popular and universal method of gaining root access on any new Android device is going to be through the method of installing Magisk. One of the main benefits of using Magisk is that you can keep Google's SafetyNet flag from being tripped, which could cause certain apps to deny user access.
Step 1: Unlock Your Bootloader
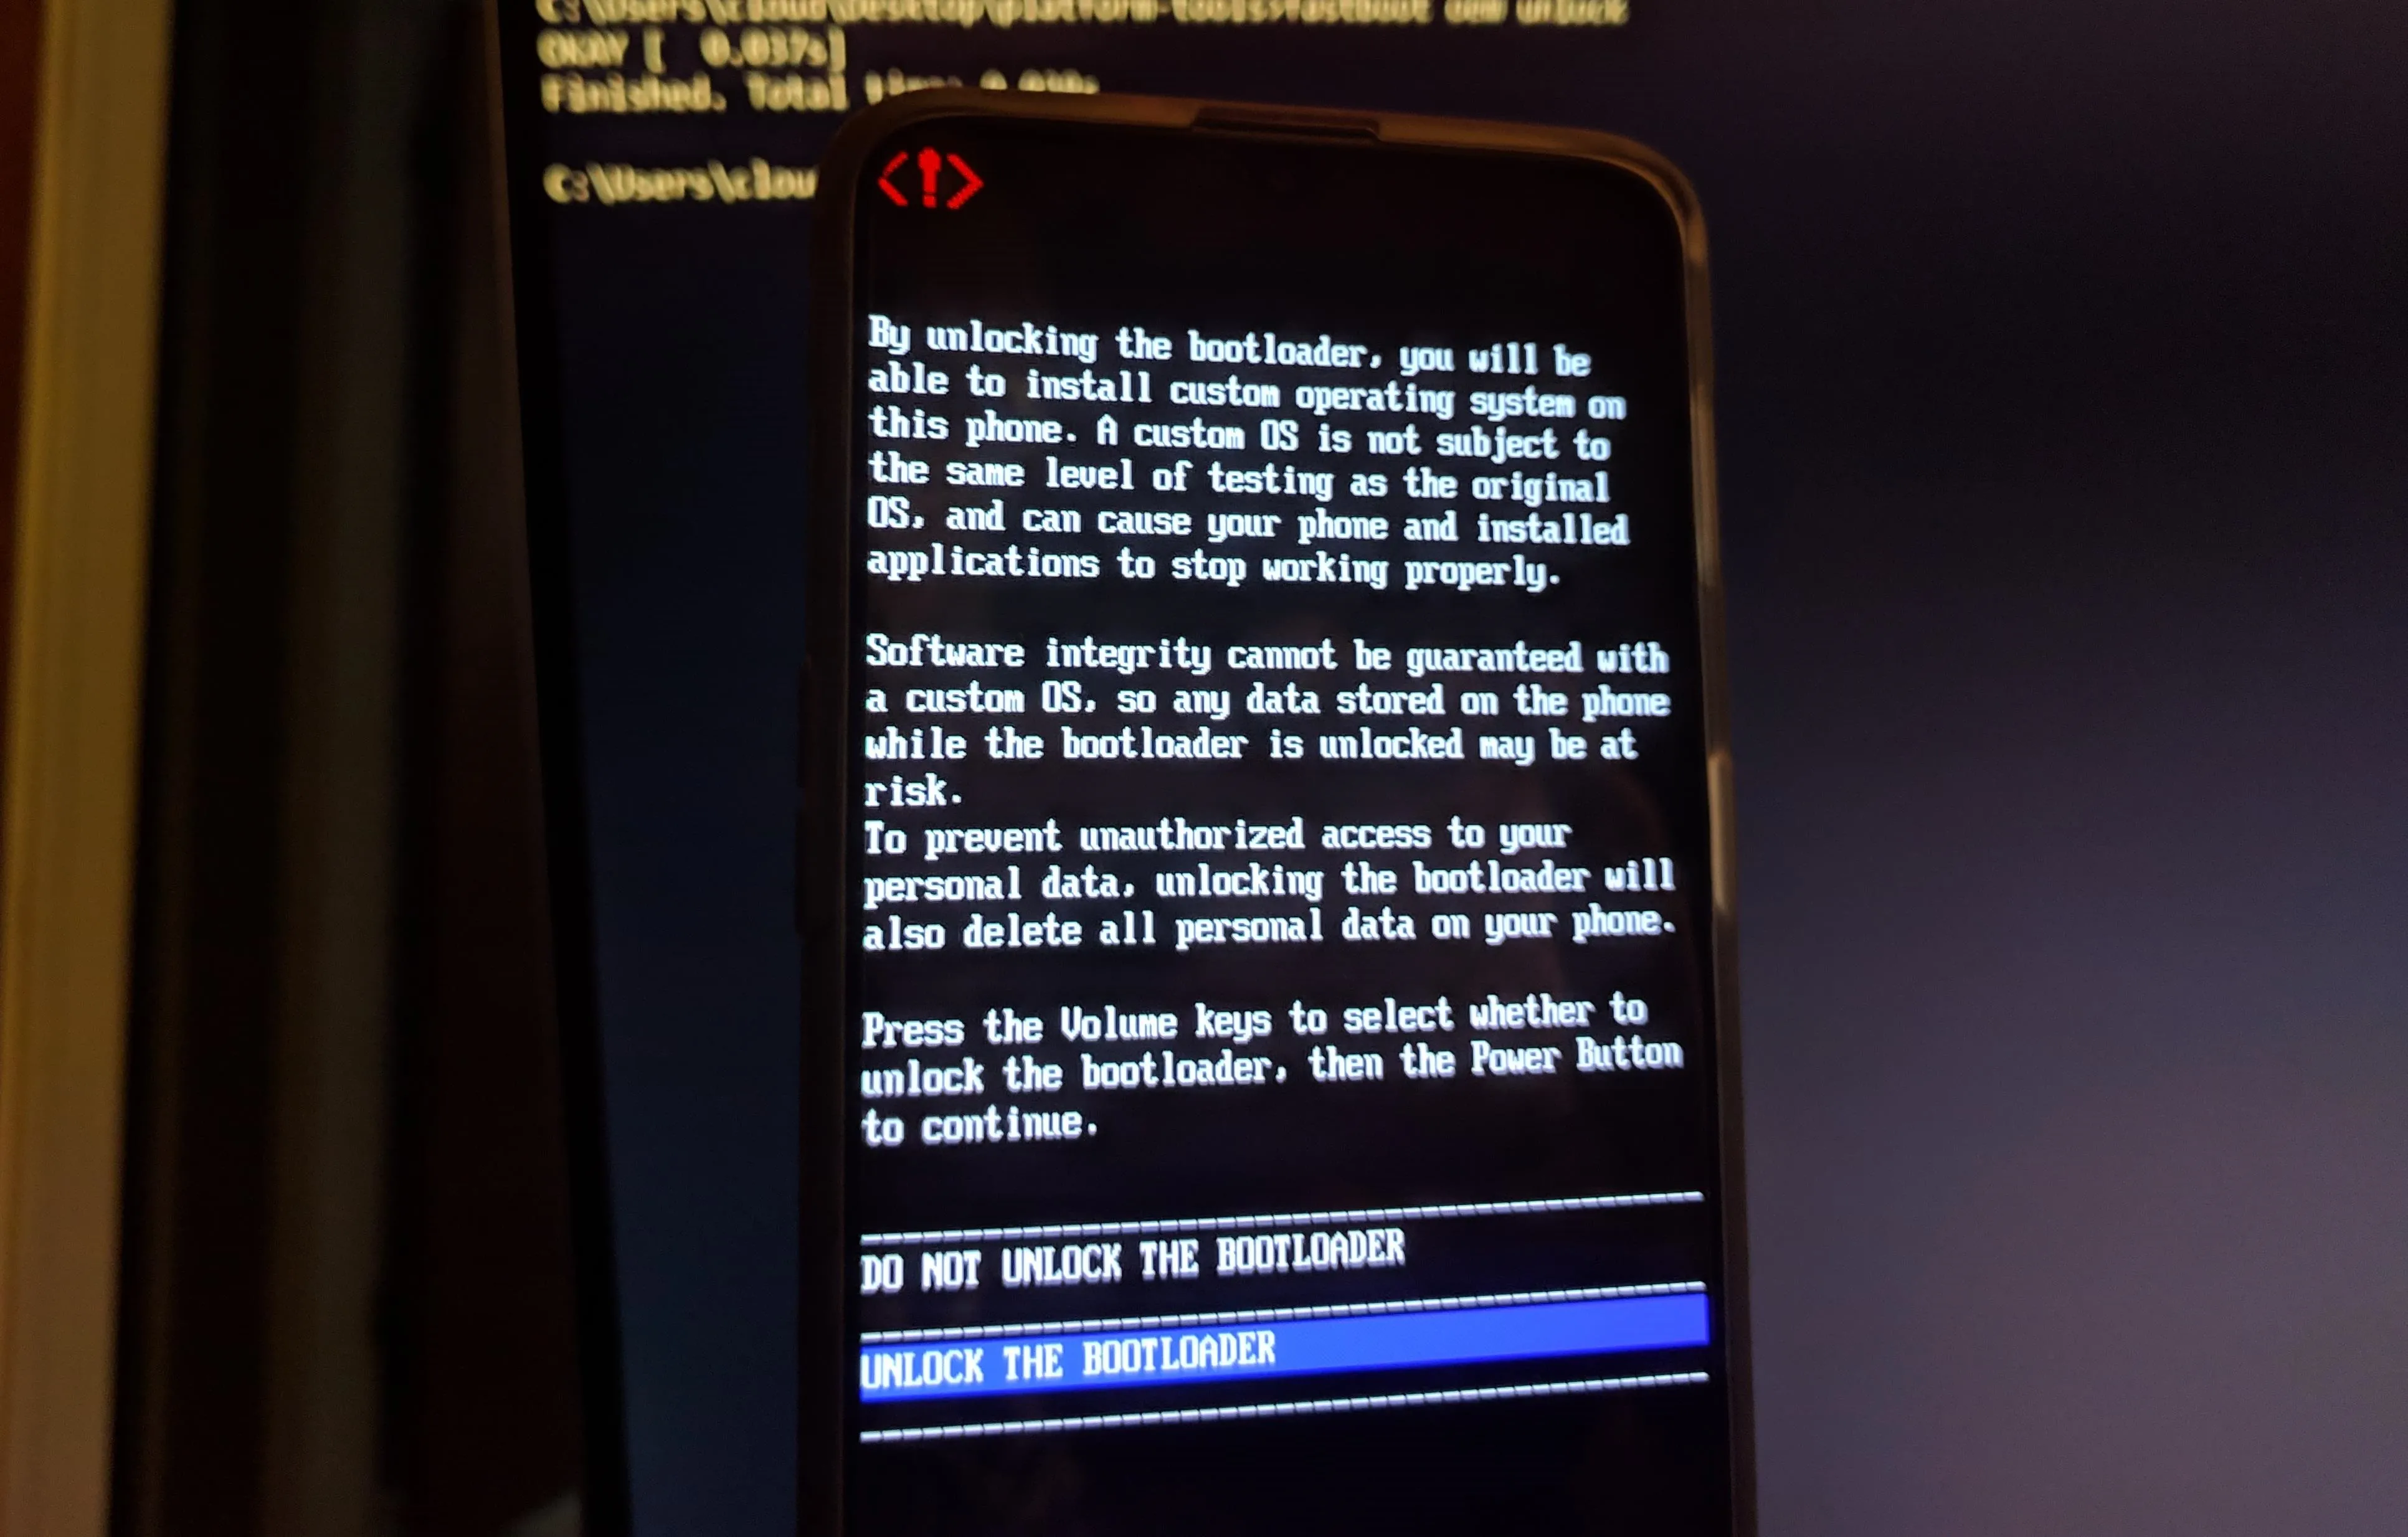
Before you can get started with installing Magisk to your device, you're going to have to make sure your bootloader is unlocked. Doing so will allow you to install any custom firmware that is compatible with your device. If you have not unlocked the bootloader yet, go ahead and check out the guide on how to do that.
- Don't Miss: How to Unlock the Bootloader on Your OnePlus 6T
Step 2: Install TWRP
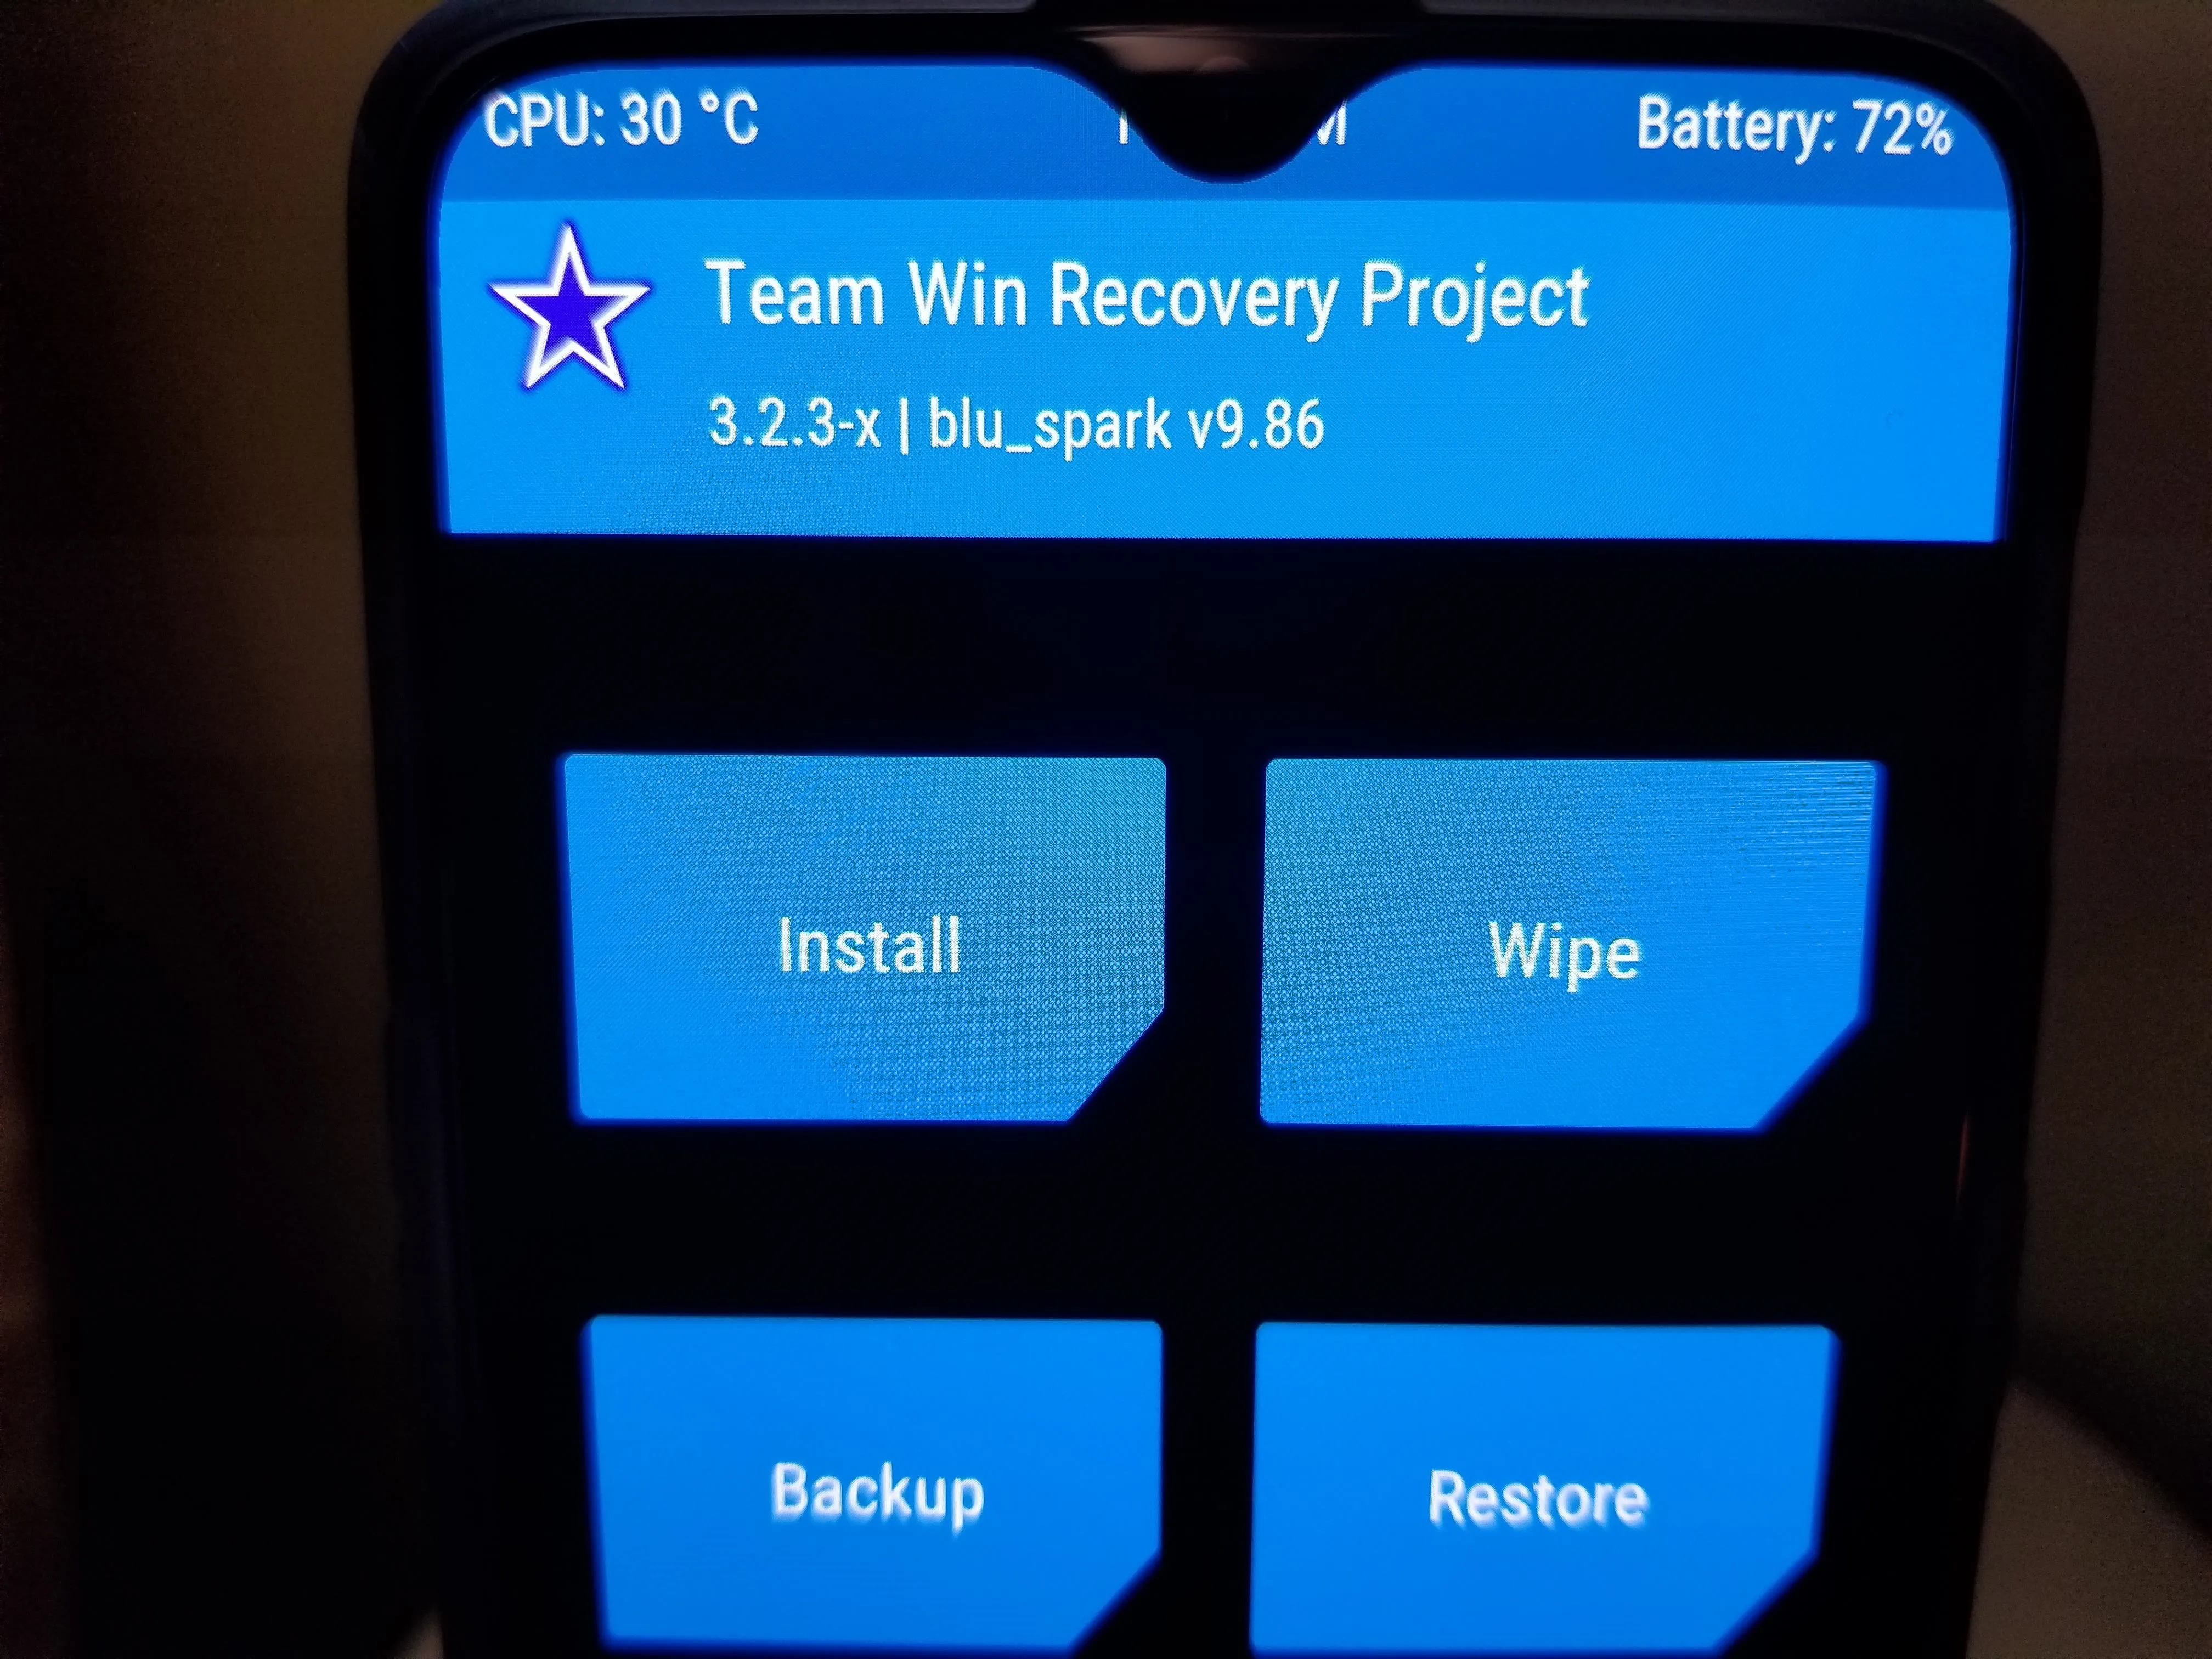
Once the bootloader is unlocked, you'll be able to move forward with installing TWRP to your device. This is a custom recovery needed to flash custom firmware and ZIP files, such as Magisk. If you have not installed TWRP to your OnePlus 6T yet, check out the guide on how to do that.
- Don't Miss: How to Install TWRP Recovery on Your OnePlus 6T
Step 3: Download the Magisk Framework
You now need to download the main Magisk ZIP file, which contains both the core Magisk system itself and the Magisk Manager app as well. The app provides you with an interface for installing modules, managing root-related permissions for your apps, and even allowing you to hide specific "problem" apps from tripping Google's SafetyNet via the Magisk Hide feature. Download the file below using your phone or transfer the file from your computer to your phone's "Download" folder.

Step 4: Boot into TWRP
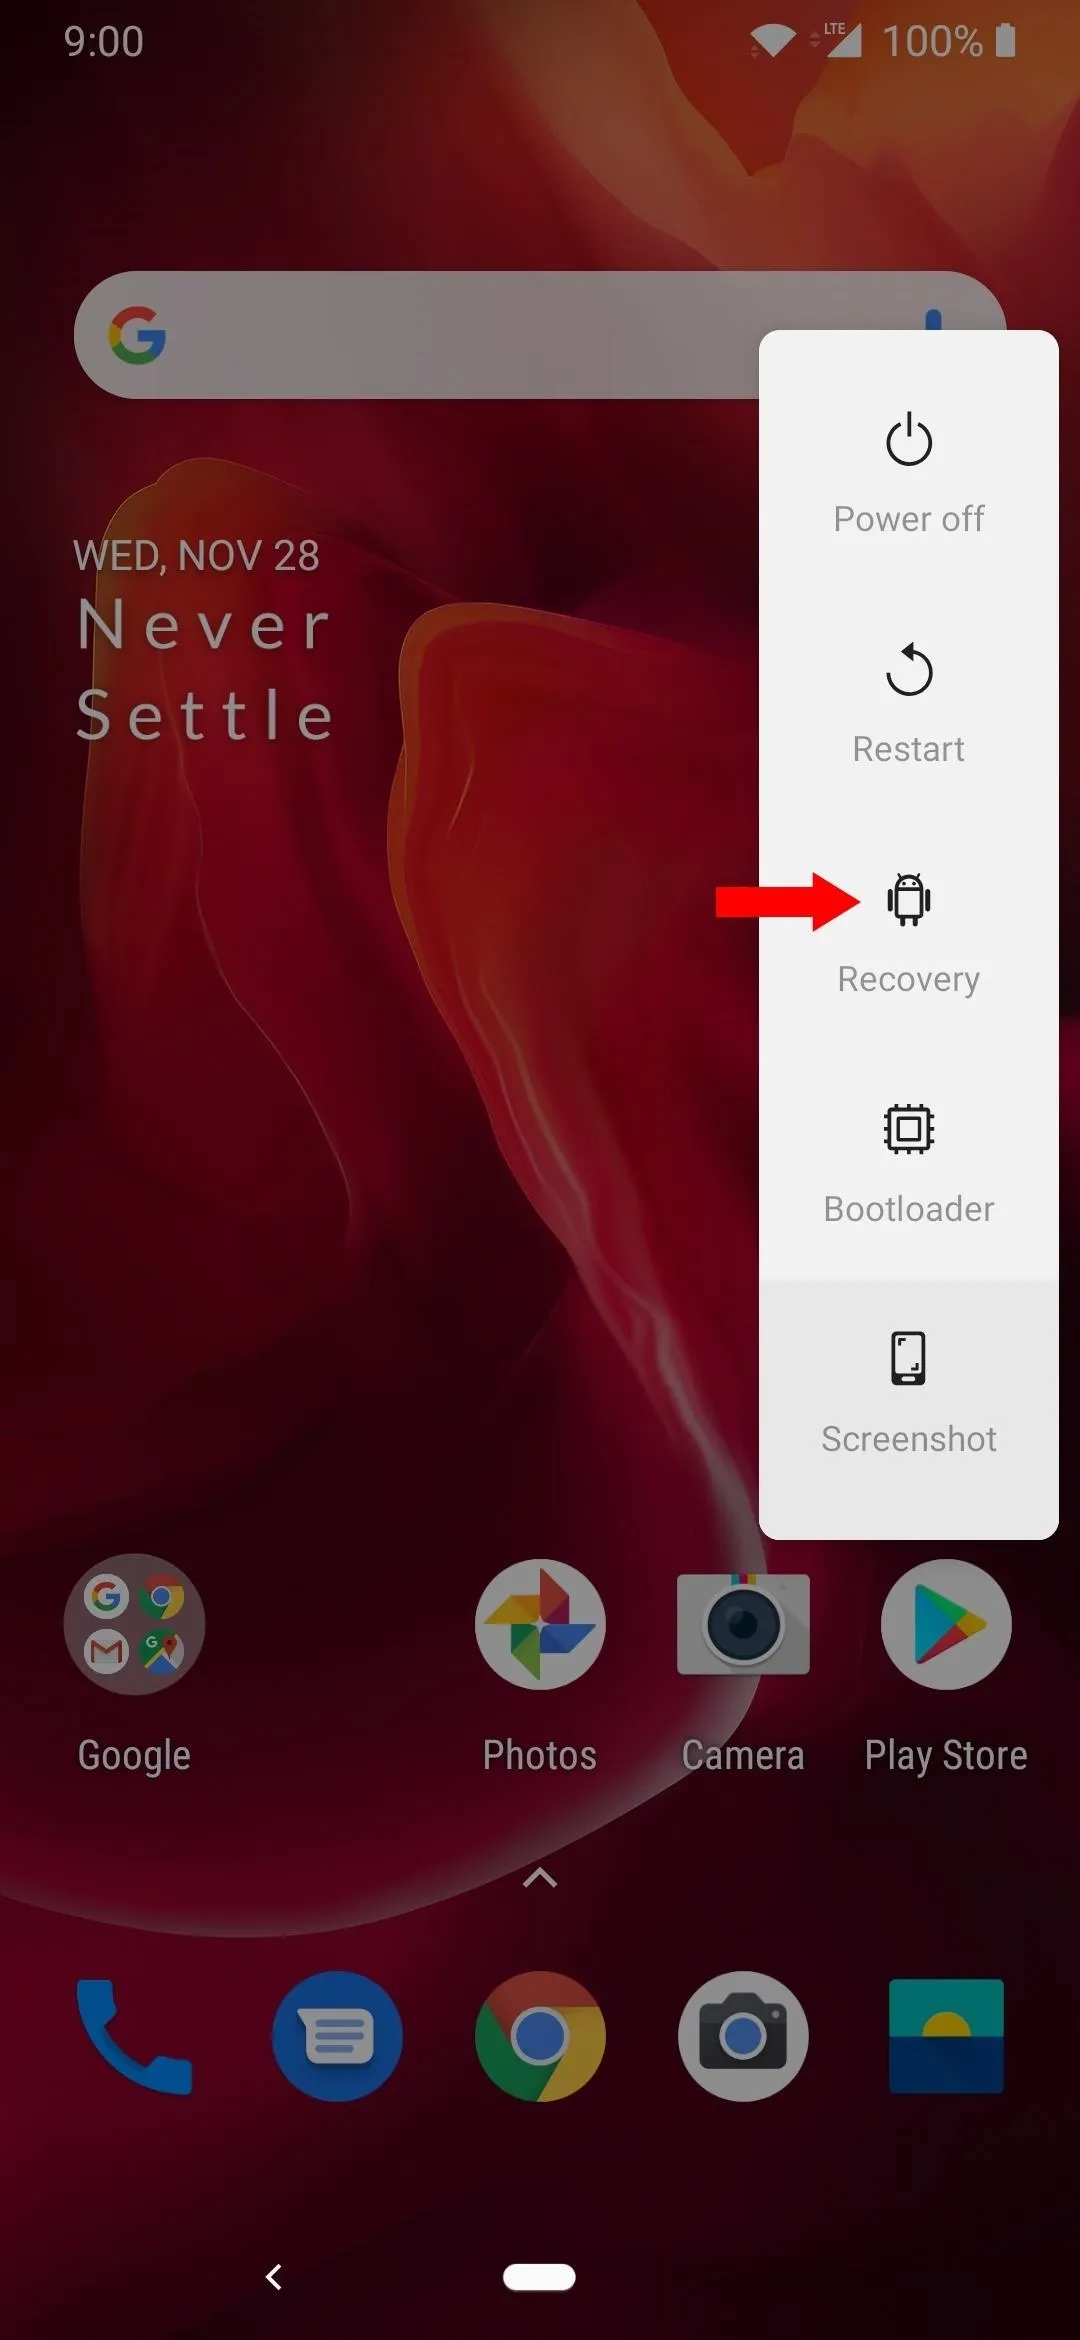
Now that you have the Magisk file you need to gain root access; you need to boot into TWRP so you can execute the install process. Bring up the power menu on your device by long-pressing the power button, then select "Recovery." If you don't see the "Recovery" option, you'll need to enable Advanced Reboot.


Step 5: Flash Magisk
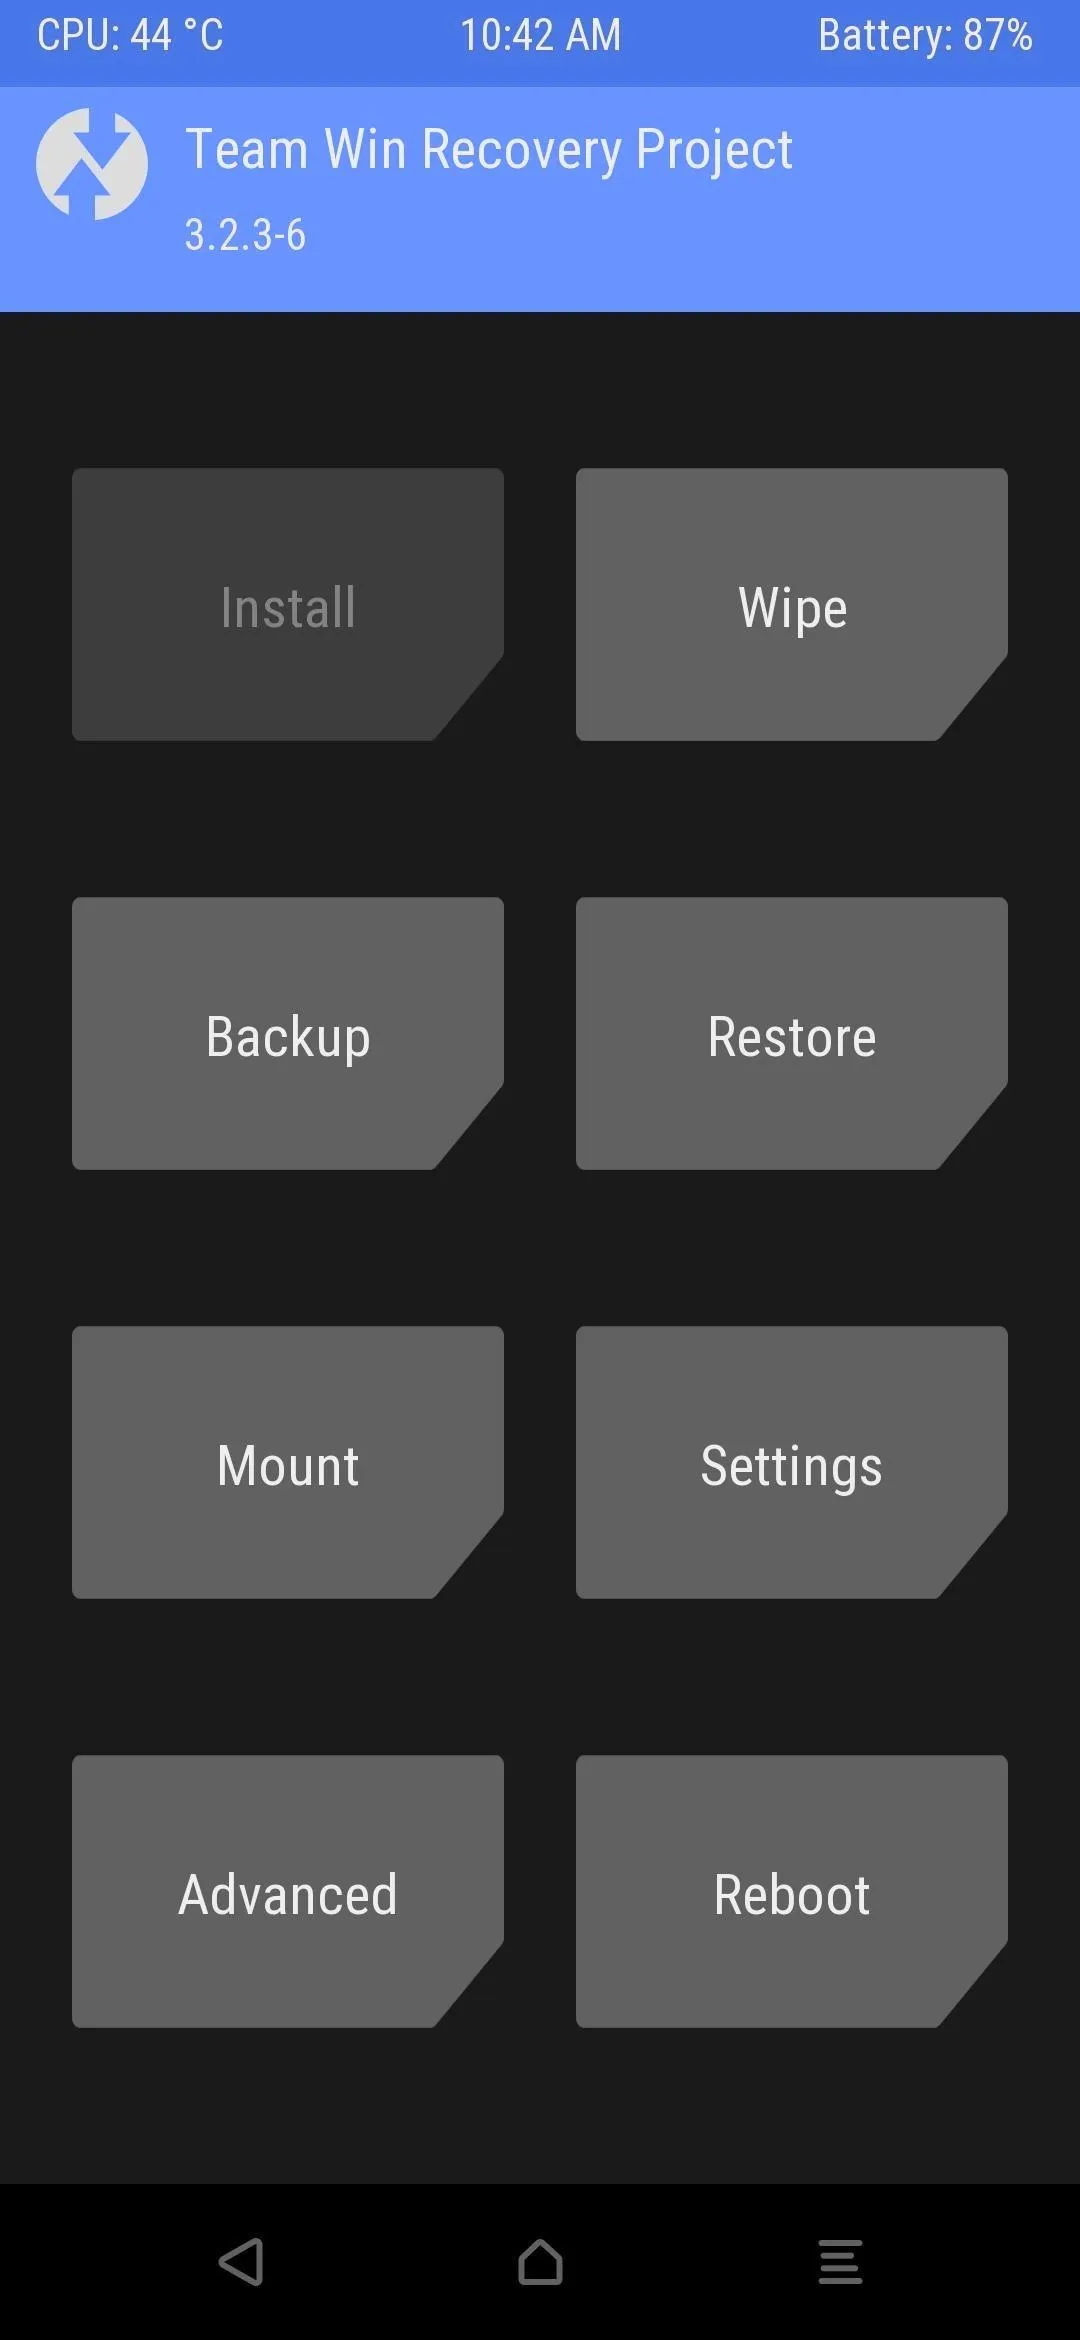
If you are running the latest version of TWRP that decrypts the internal storage (3.2.3-6), you will be prompted to enter your PIN or password. Once you do that, you should be on the main menu of TWRP and ready to move onto installing Magisk. Start by tapping "Install," then navigate to the folder where the Magisk ZIP file is stored. The default location most web browsers save files to will be in the "Download" folder. Tap the file you want to install and then initiate the "Swipe to confirm Flash" slider to begin.
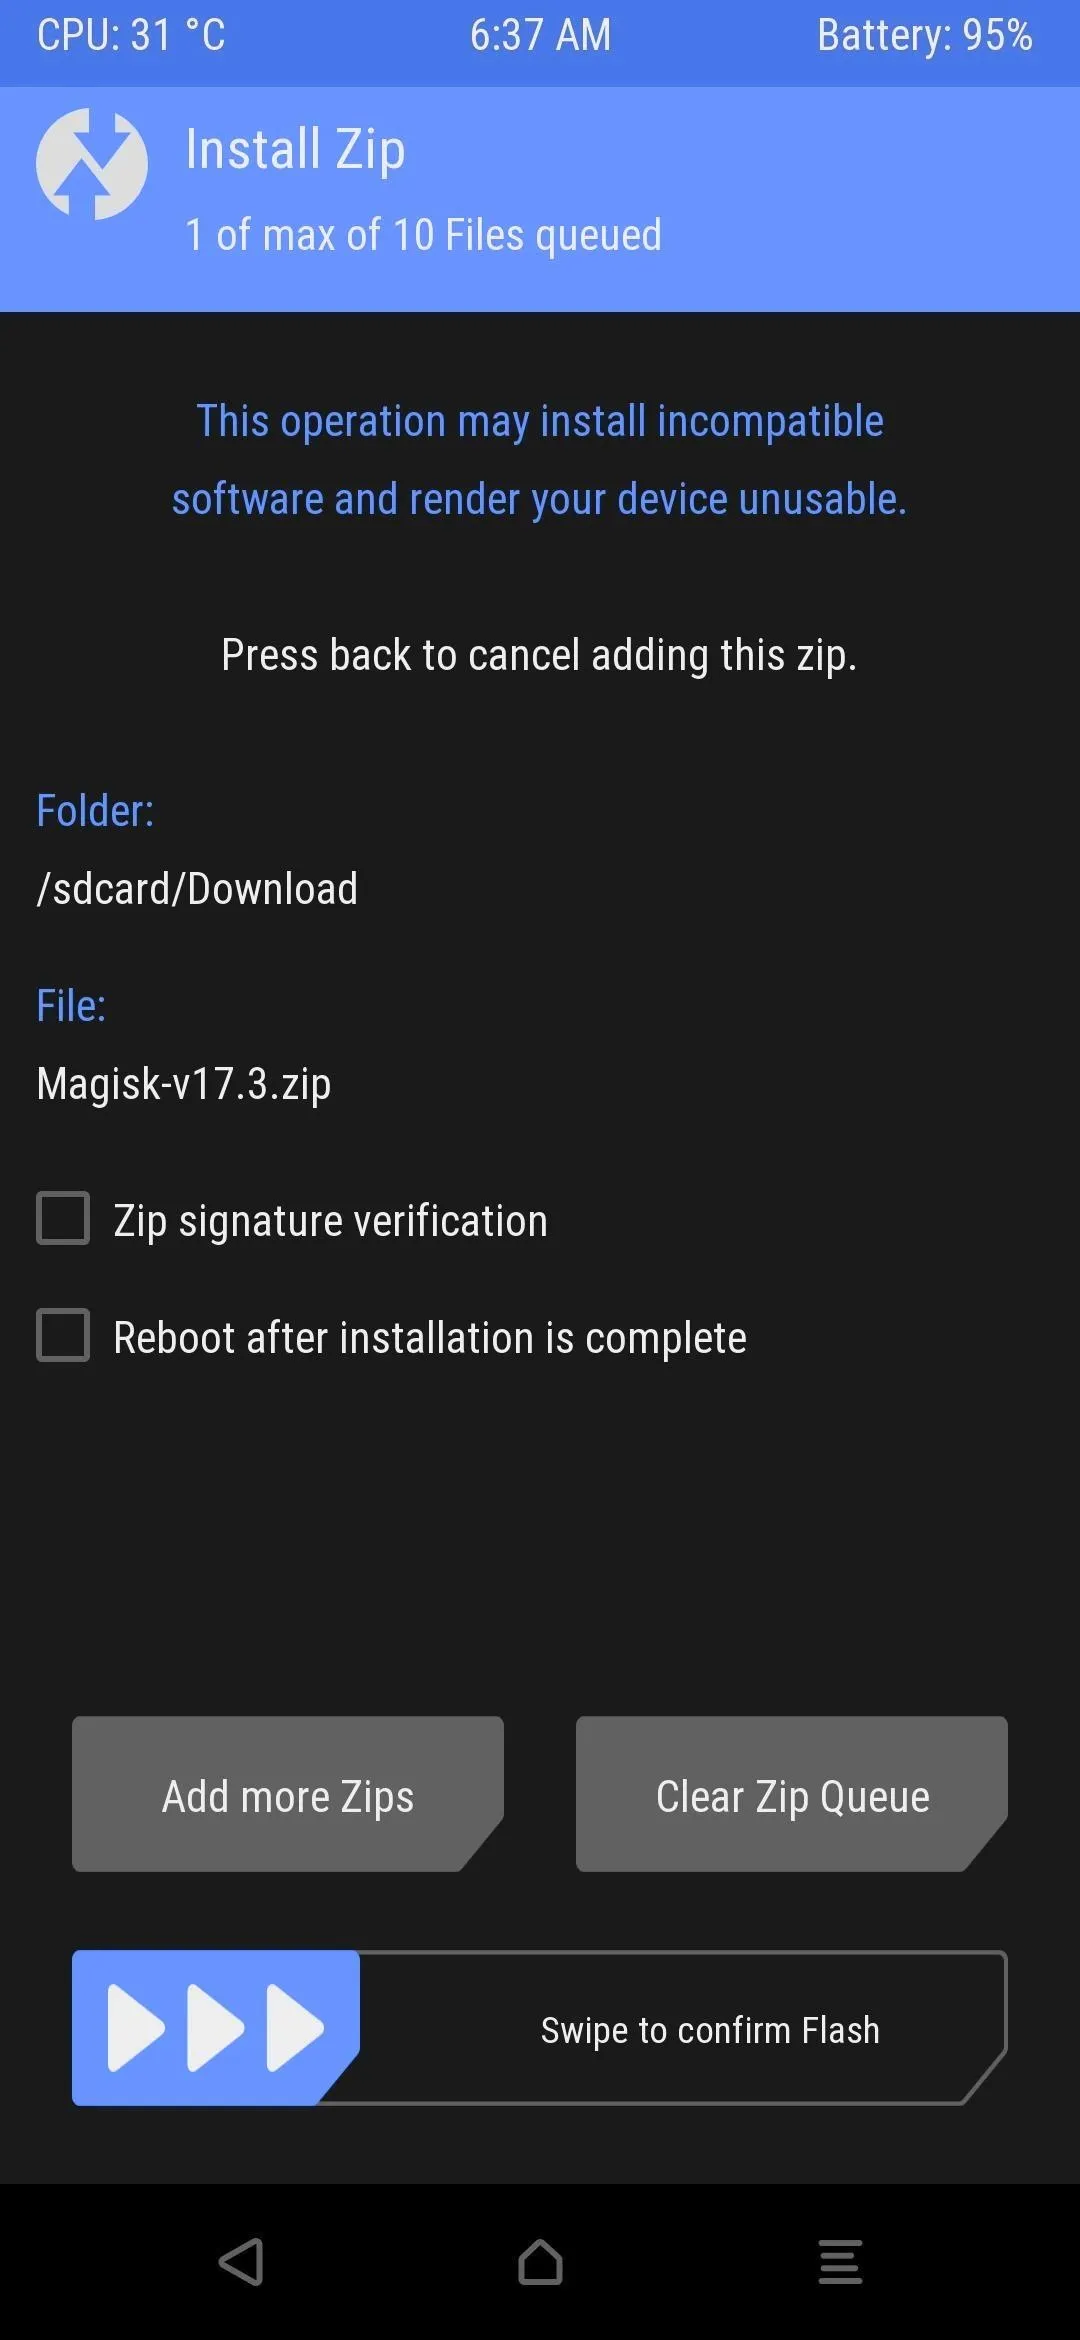
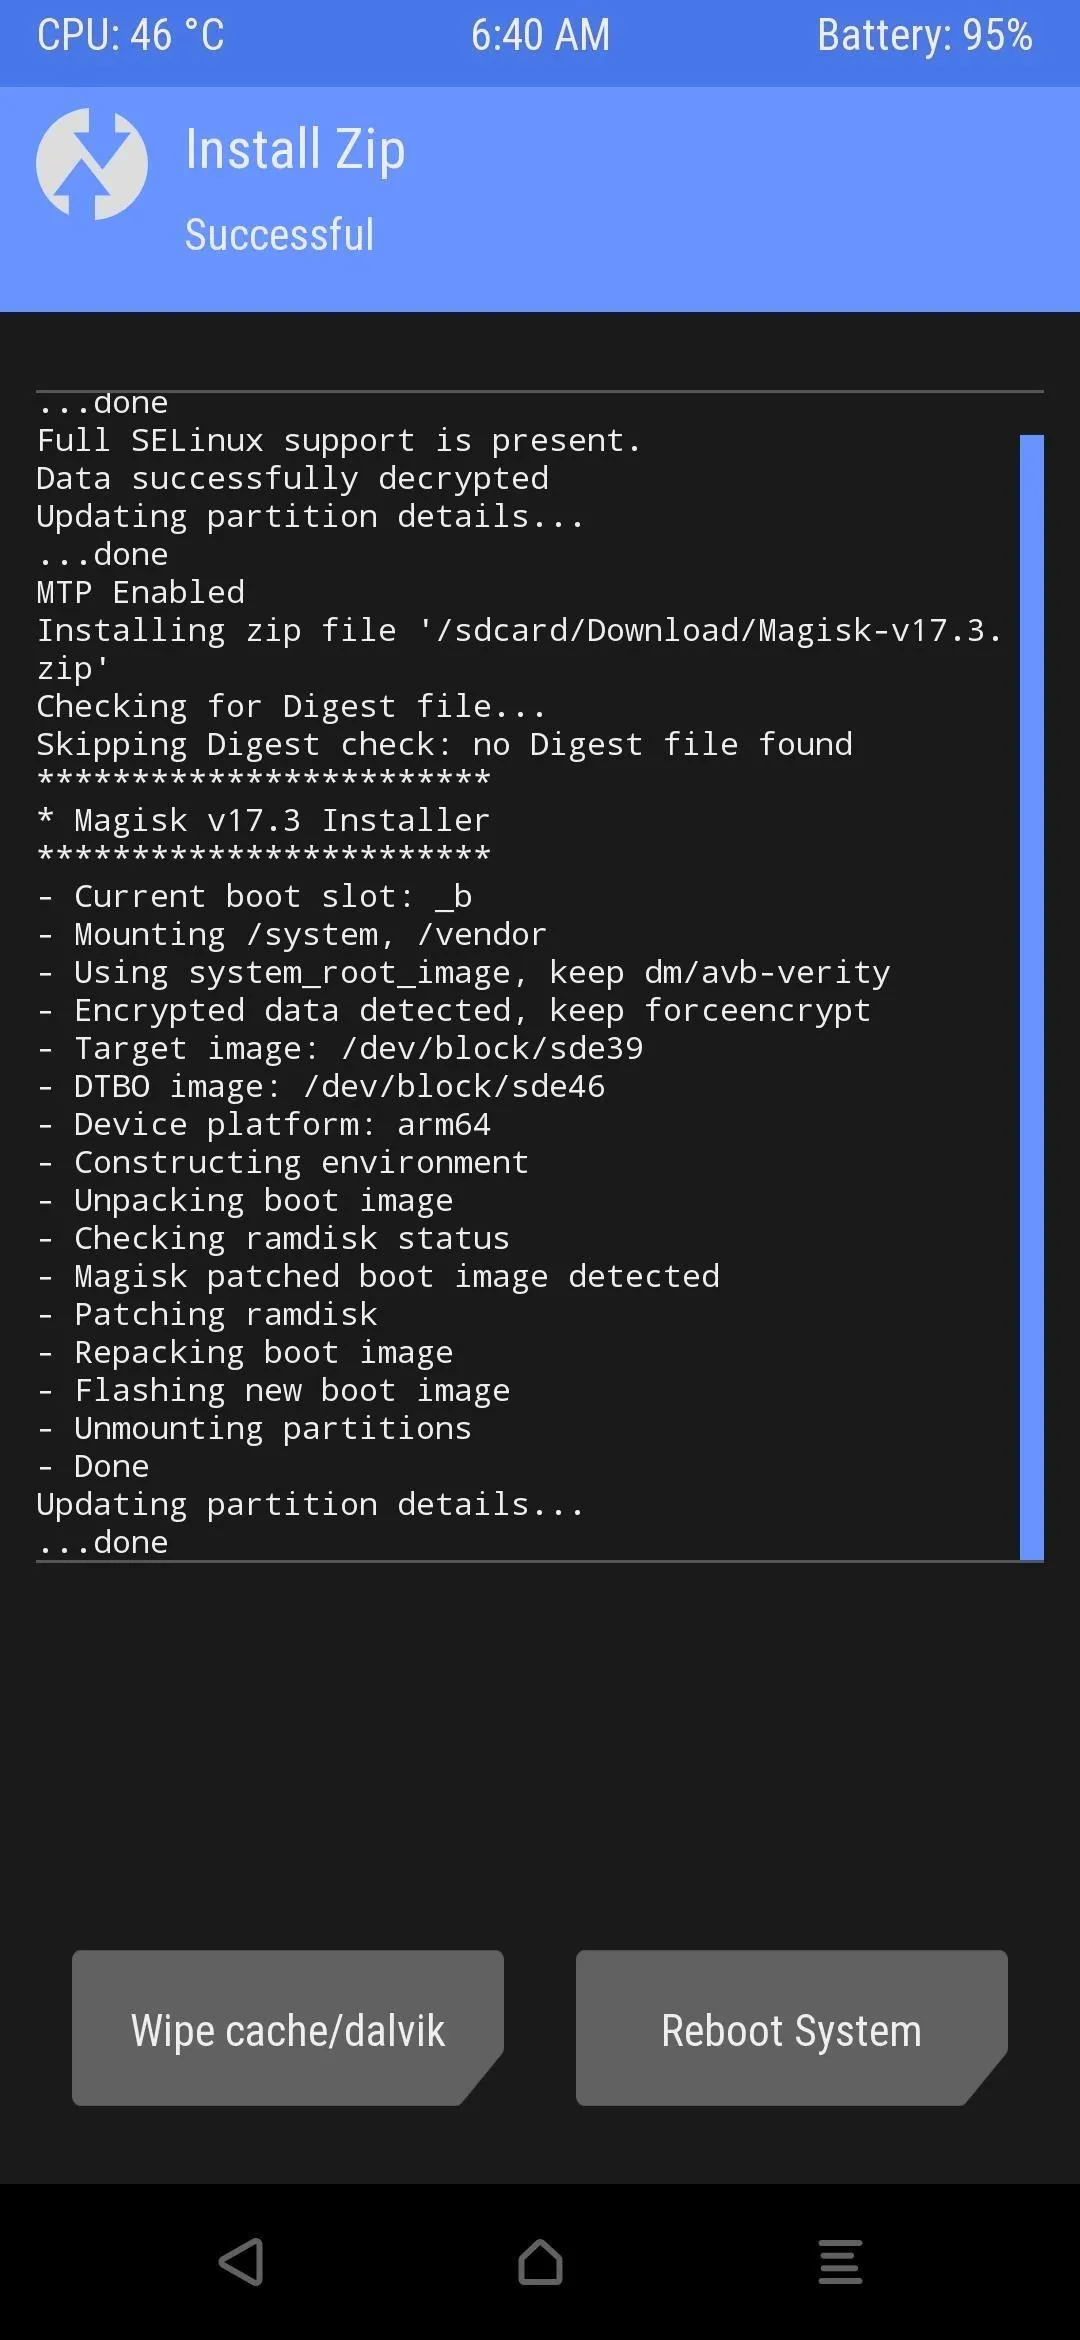


It will now install Magisk to your device, so let it do its thing, and you'll be ready to go in no time! Once you see it successfully installed, go ahead and tap "Reboot System" to get back into your operating system. Now, head into the app drawer on your home launcher, and you should notice a new app installed called "Magisk Manager."
Note: Should you ever find yourself in a bootloop after installing anything in TWRP, try flashing Magisk again to resolve your booting issues. The way new devices work with the A/B system partition, the device won't boot if Magisk is not currently installed on the active slot after a reboot. So don't worry — your device isn't bricked, and your data should be safe and sound as expected!
Step 6: Verify Root & SafetyNet Status
Go ahead and open the Magisk Manager app, and from the main menu, you want to use the "Tap to start SafetyNet check" option. You should be prompted to download an extension that is needed for Magisk to begin the SafetyNet check. Tap "Yes" to confirm the download, and then within a few seconds, you should see the awesome "SafetyNet Check Success" message.
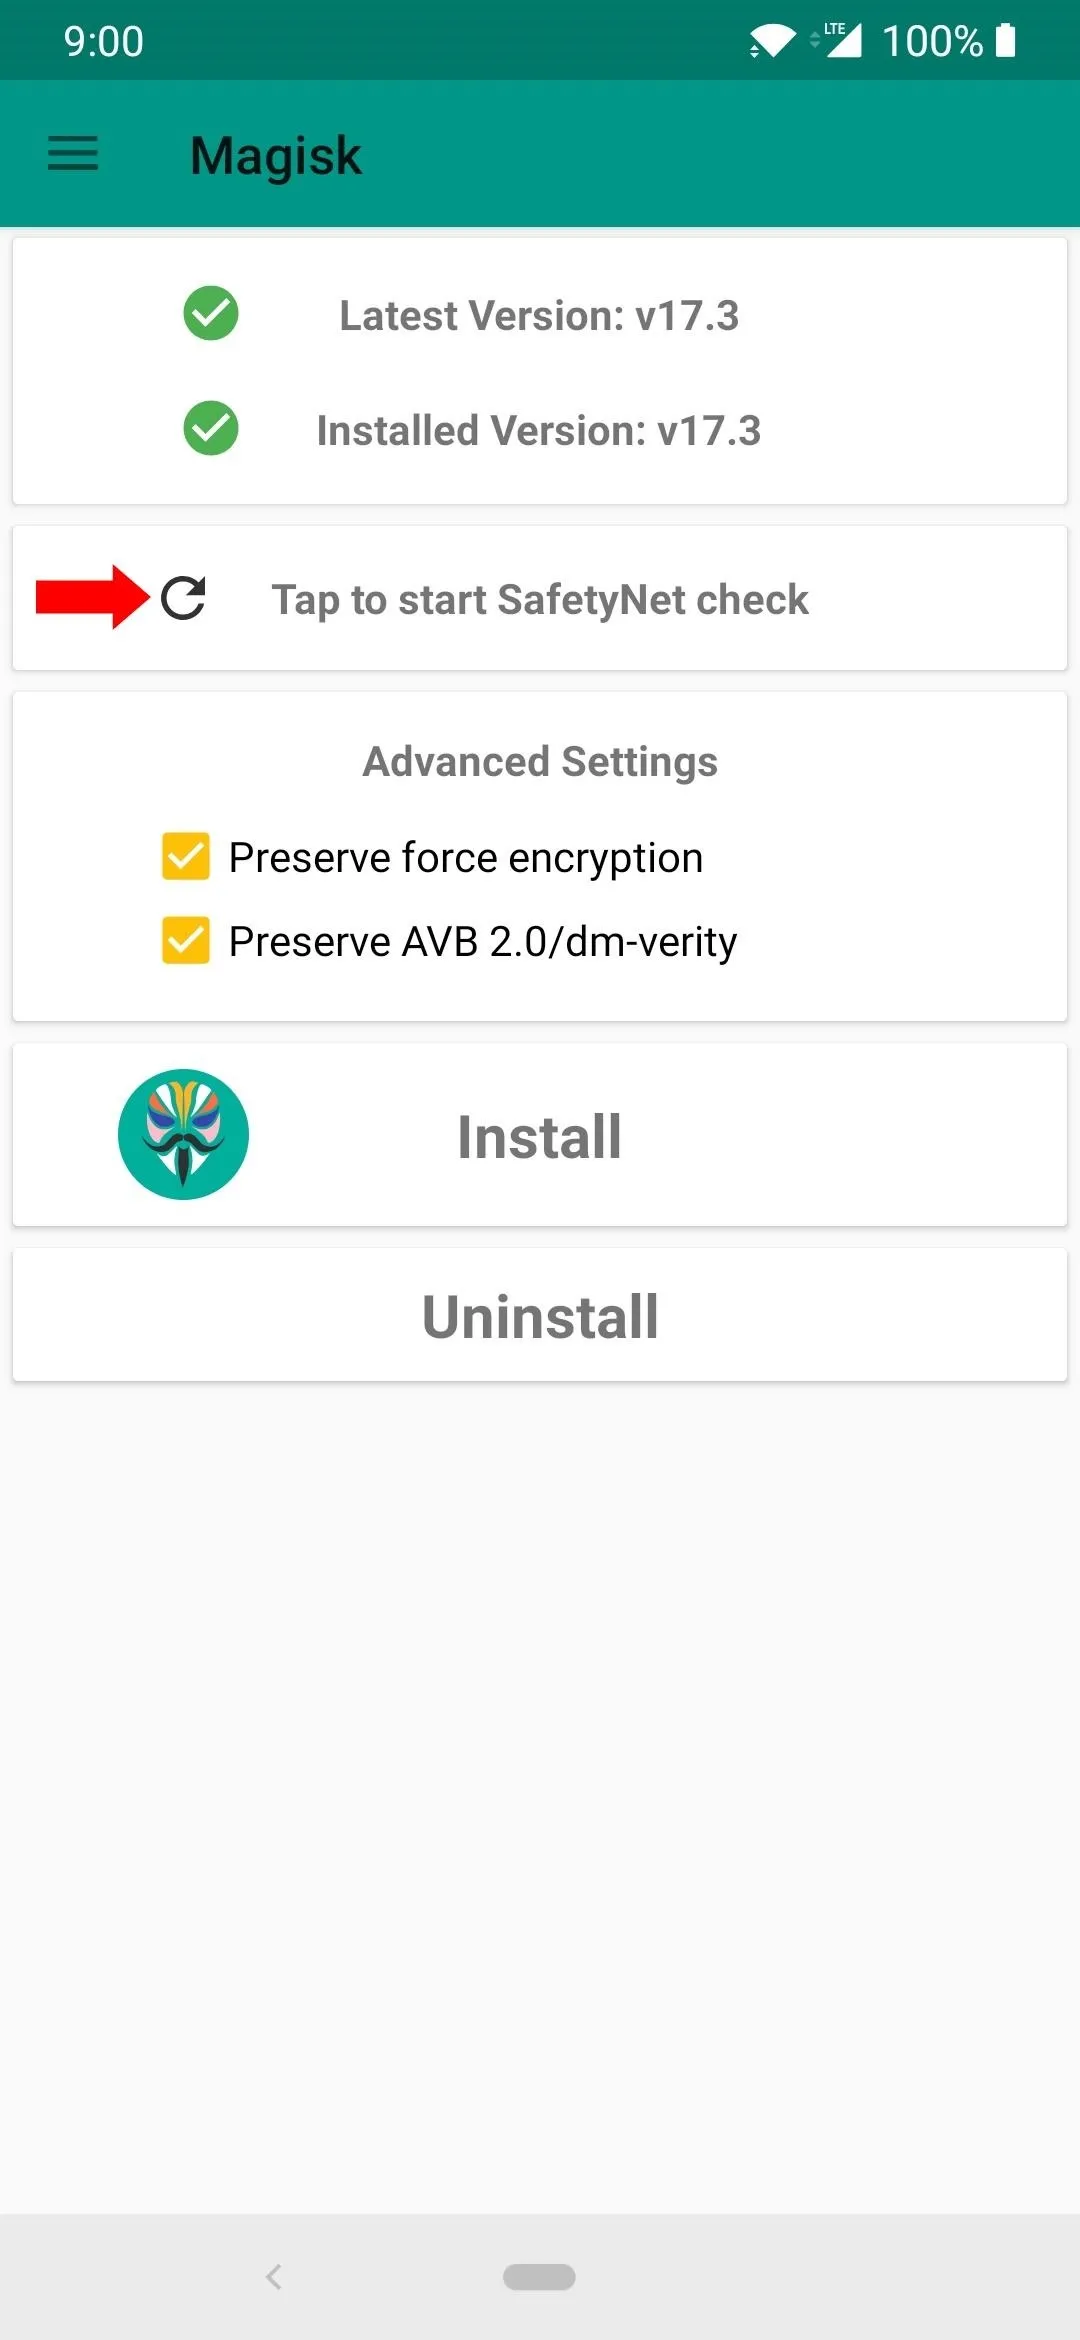
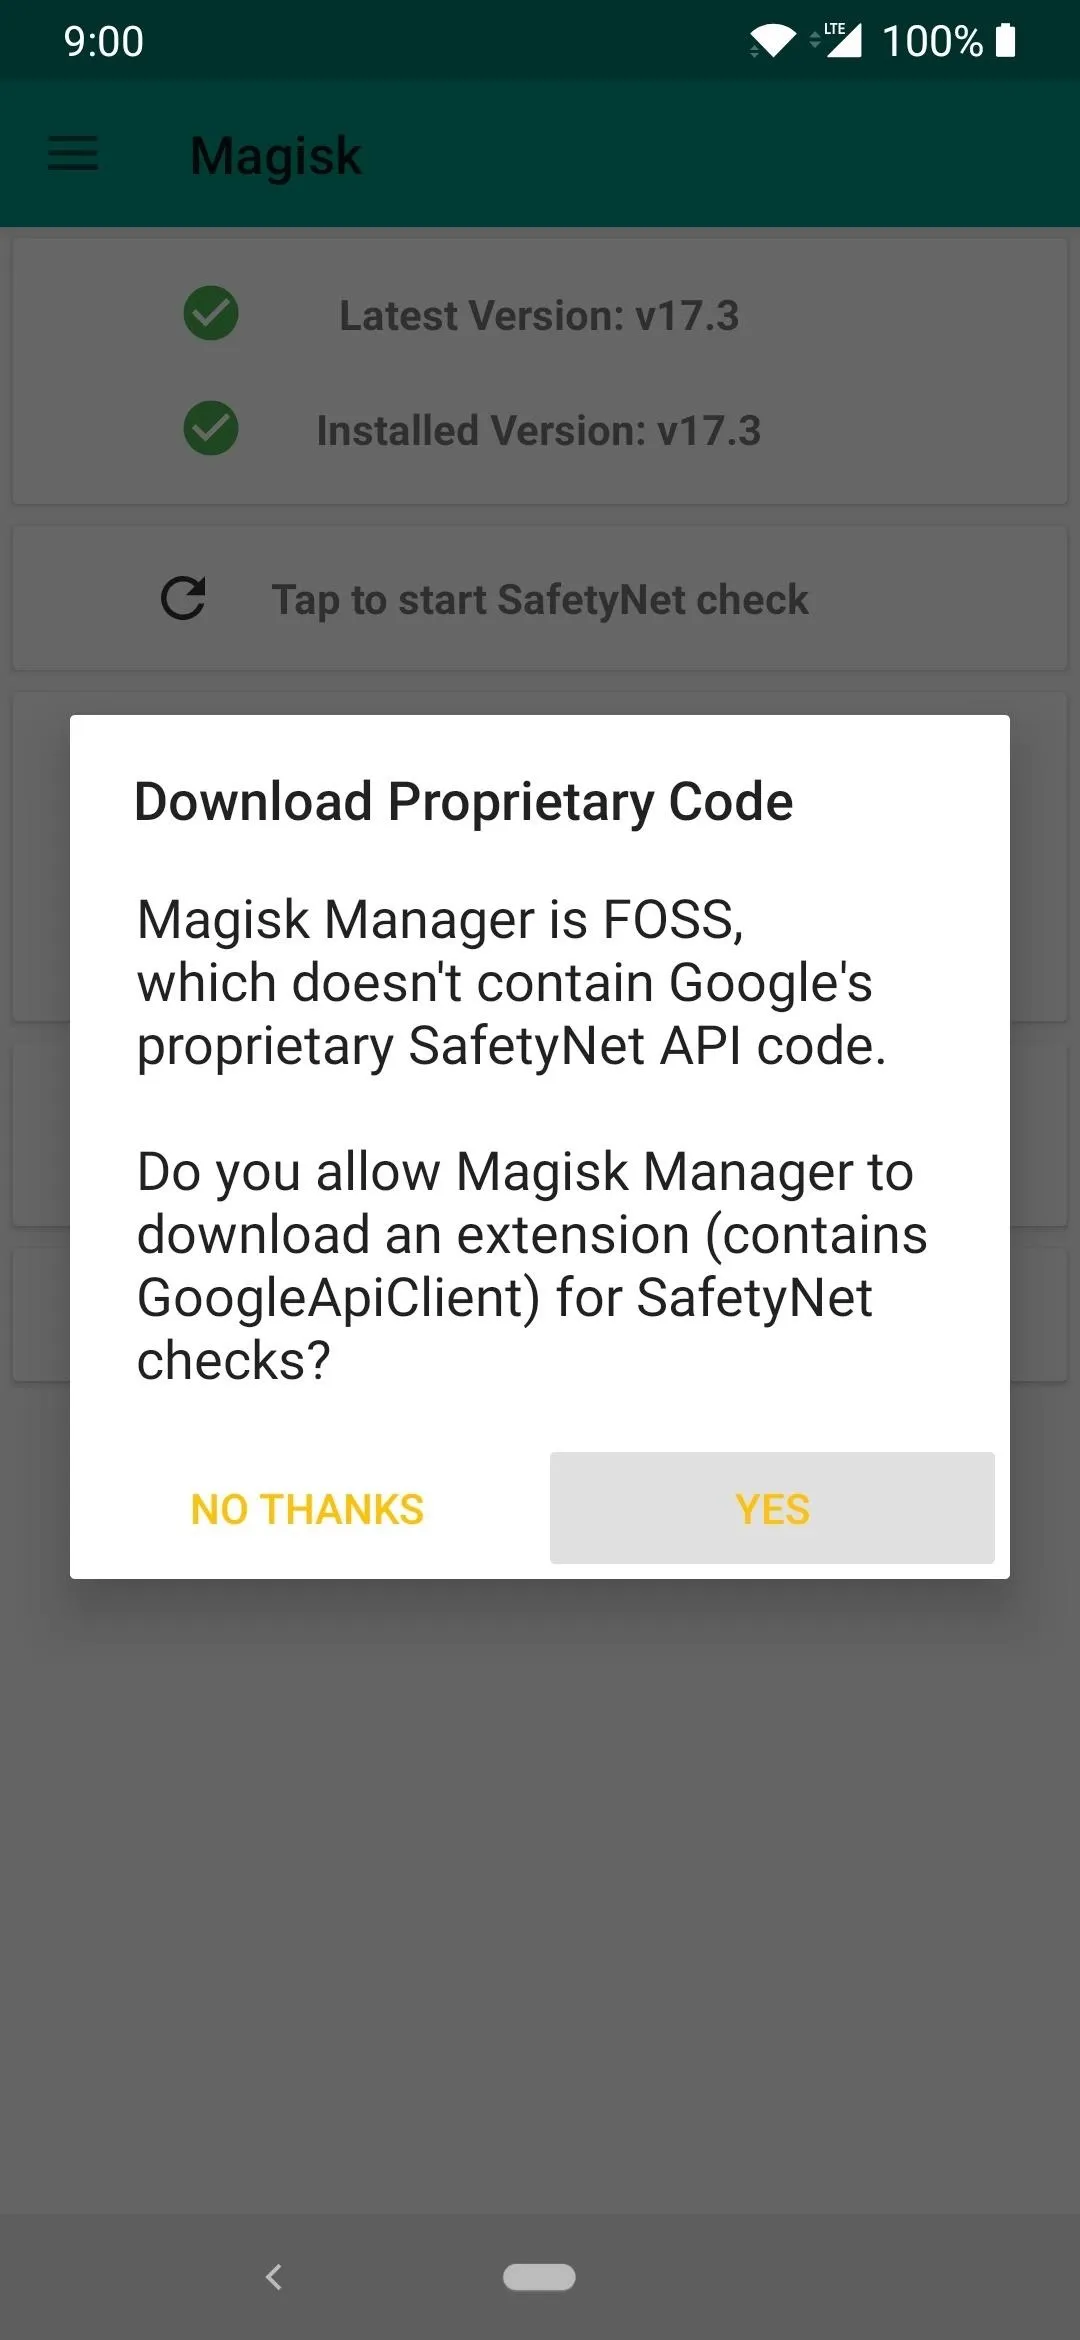
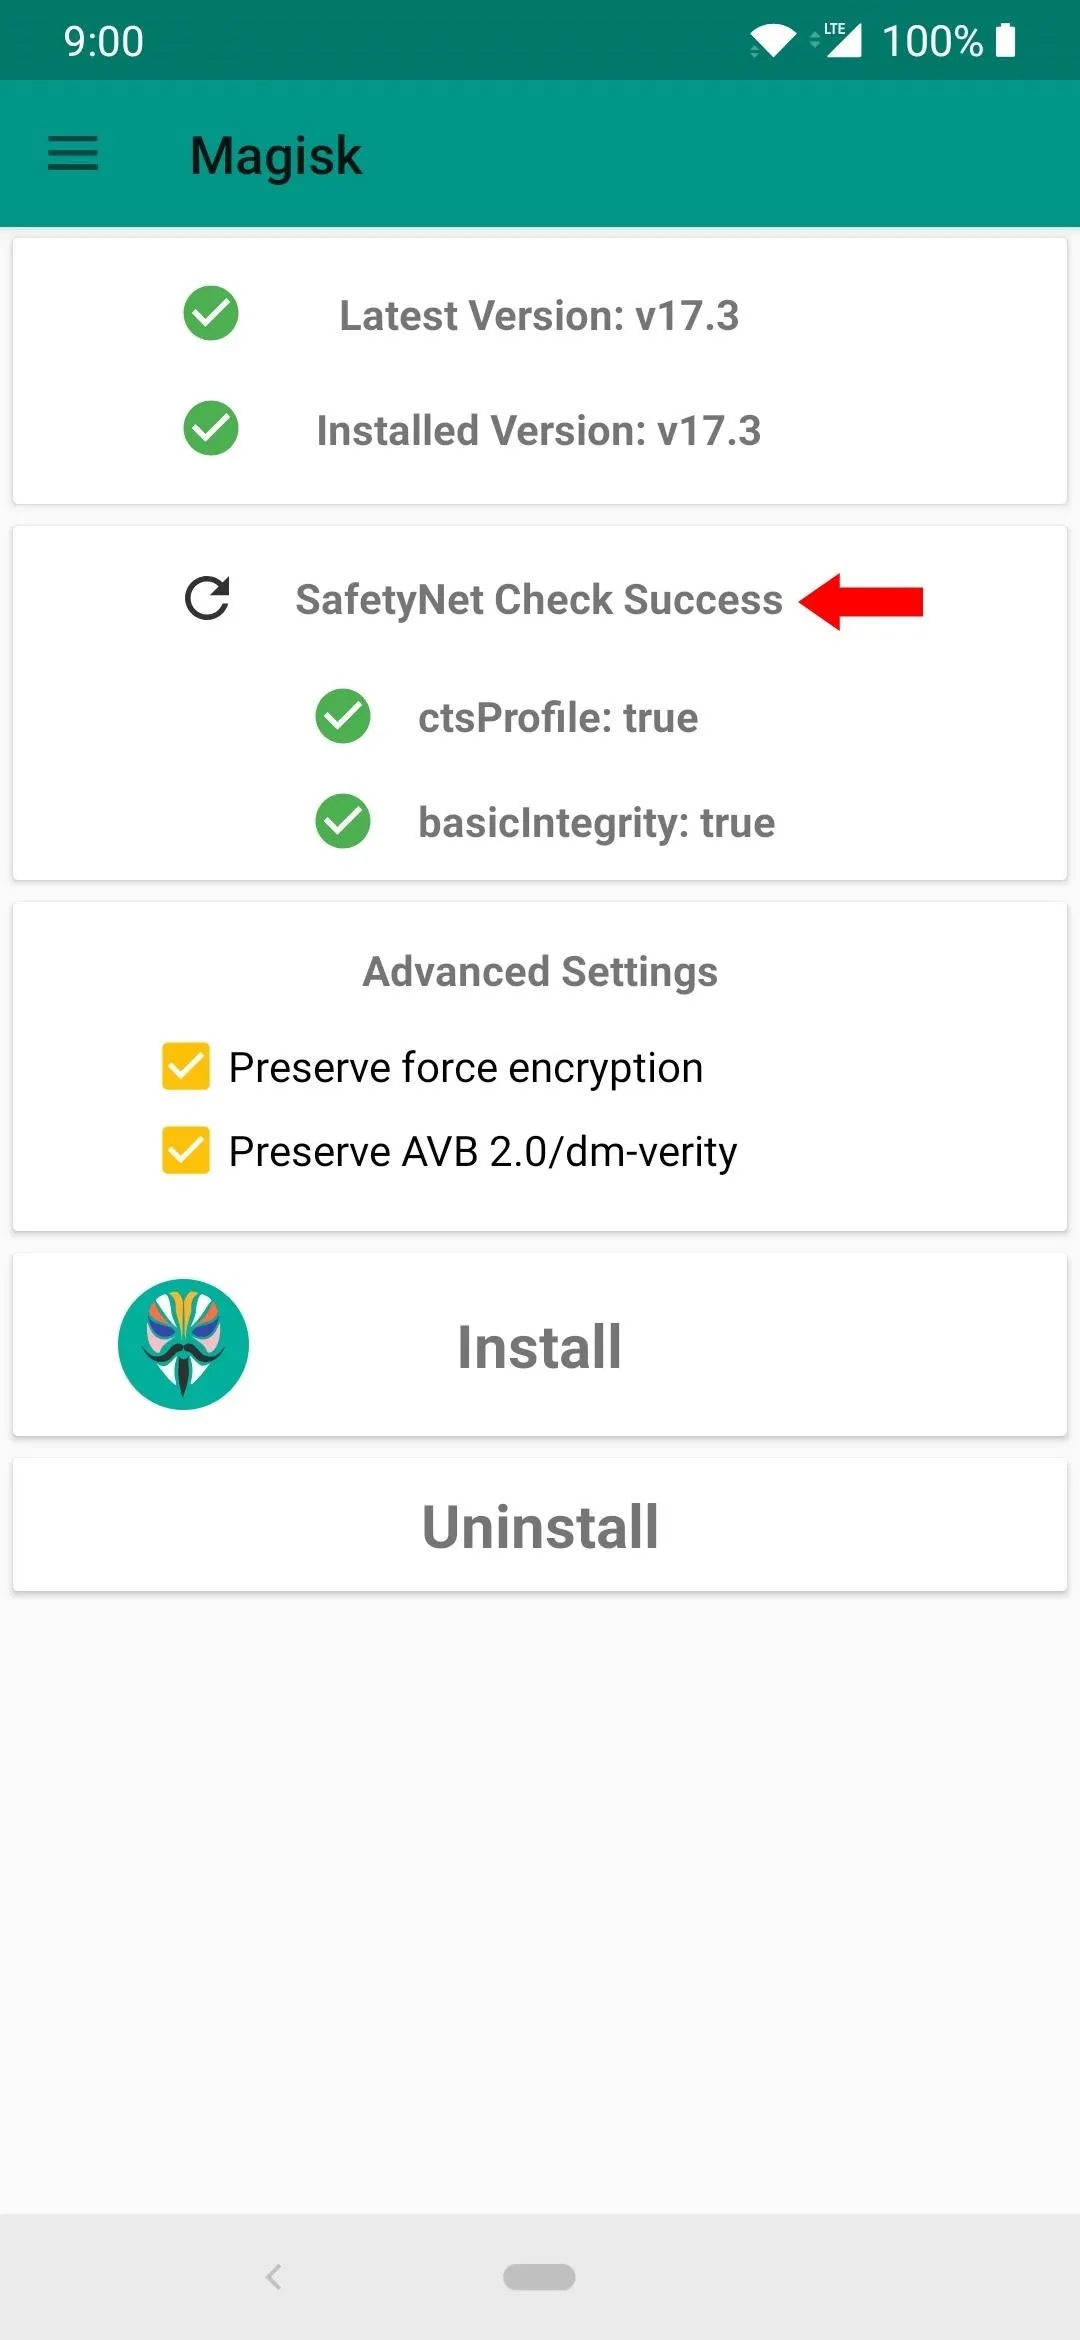


This means you not only have full root access, but your device has also passed Google's SafetyNet checks, which is precisely what you are looking for! No need to worry about losing access to apps such as Netflix, Android Pay, and even some newer games all the same. Now you are ready to explore what the world of rooting has to offer to your OnePlus 6T. Happy modding!
- Follow Gadget Hacks on Pinterest, Reddit, Twitter, YouTube, and Flipboard
- Sign up for Gadget Hacks' daily newsletter or weekly Android and iOS updates
- Follow WonderHowTo on Facebook, Twitter, Pinterest, and Flipboard
Cover image and screenshots by Stephen Perkins/Gadget Hacks


Comments
No Comments Exist
Be the first, drop a comment!